
How to Optimize Images for Faster Website Speed: A Comprehensive Guide
Boost your website's performance with smart image optimization techniques.
Are slow-loading images dragging down your website's performance? You're not alone. Many websites suffer from sluggish speeds due to improperly optimized images.
Imagine a website that loads instantly, captivating visitors from the moment they click. Image optimization is the key to unlocking that experience.
Ready to transform your website from a slowpoke into a speed demon? Let's dive in and learn how to optimize images for faster website speed!
Website speed is more critical than ever in today's digital world. Slow-loading websites frustrate users and hurt search engine rankings. Large, unoptimized images often cause slow website speeds. This guide explains how to optimize images for faster website speed. It ensures your website provides a smooth and engaging user experience. You will explore techniques, tools, and best practices to optimize images effectively. This keeps image quality while reducing file sizes.
Quick navigation
Why Image Optimization Matters
Understand the "why" before the "how." Why optimize images? The answer involves several factors:
First, image optimization affects website speed. Larger image files take longer to load. This causes visitors to leave, especially on mobile devices. Fast loading times are essential for keeping visitors engaged.
Second, search engines like Google prioritize website speed in their ranking algorithms. A faster website is more likely to rank higher in search results. This increases visibility and organic traffic. Image optimization is part of search engine optimization (SEO).
Third, image optimization improves user experience. Faster loading times lead to a better experience for your visitors. This can increase conversions, lower bounce rates, and boost engagement. Isn't that what everyone wants?
Choosing the Right Image Format
Selecting the correct image format is one of the first and most important steps in image optimization. Different formats suit different image types. They have varying levels of compression and quality. Which format is best for your website?
Here's a breakdown of common image formats:
- JPEG (JPG): Good for photographs and images with many colors. JPEGs offer good compression, but some quality loss is unavoidable.
- PNG: Best for images with sharp lines, text, and logos. PNGs support transparency, but they result in larger file sizes than JPEGs.
- GIF: Good for simple animations and images with a limited color palette. GIFs also support transparency but have a low color count.
- WebP: A modern image format from Google. It offers better compression and quality than JPEG and PNG. WebP supports lossy and lossless compression.
WebP is the recommended format for most websites. If you can't use WebP, JPEG is usually best for photographs and PNG for graphics and logos. The format choice impacts file size and visual quality. Do you know which is best for your website?
Image Compression Techniques
Image compression reduces file sizes by removing unneeded data. There are two main types of compression: lossy and lossless. Understanding these is vital for optimizing images for faster website speed.
Lossy Compression: This method reduces file size by removing some image data. Some quality is lost, but the file size reduction is often significant. JPEGs often use lossy compression. You can adjust the compression level to balance file size and image quality.
Lossless Compression: This method compresses images without removing any data. This results in a smaller file size without losing image quality. PNGs use lossless compression. Lossless compression doesn't reduce file sizes as much as lossy compression. But, it ensures your images keep their original quality.
Choose the right compression method based on the image type and your priorities. Lossy compression often works well for photos. Lossless compression is best for graphics where you must keep every detail. Are you ready to choose the right one?
Resizing Your Images
Resizing images to fit the space they occupy on your website is another critical optimization aspect. Displaying a large image in a smaller space wastes bandwidth and slows loading times. How big should your images be?
Here’s how to resize images effectively:
- Determine Display Size: Know how an image will display on your website before uploading it. Use the correct dimensions for the content area or element.
- Use Image Editing Software: Programs like Adobe Photoshop, GIMP, or online tools like TinyPNG can help you resize images accurately.
- Consider Retina Displays: Provide images twice the display dimensions for high-resolution displays to ensure sharpness.
Resizing images correctly ensures they display at their optimal size without extra data. Do you know the dimensions for your images?
Using Responsive Images
Responsive images are essential with the variety of devices accessing the internet. Responsive images adapt to the device's screen size and resolution. This provides an optimized experience for all users. Do you know how responsive images can help you?
Here’s how responsive images work:
- Multiple Image Sizes: Create several image versions at different sizes.
- Use the <picture> Element or <img> with srcset: These HTML elements let you specify which image version displays based on the device's screen size and resolution.
- Browser Selection: The browser automatically chooses the most suitable image based on the device's capabilities.
Implementing responsive images improves loading times, especially on mobile devices. It also optimizes bandwidth usage, which helps create a faster and more efficient website. Is your website mobile-friendly?
Lazy Loading Images
Lazy loading delays loading images until needed. This happens when they are in the user's viewport. This can significantly improve the initial page load time. Have you used lazy loading before?
Here's how lazy loading works:
- Native Lazy Loading: Use the `loading="lazy"` attribute in your `<img>` tags. Most modern browsers support this simple approach.
- JavaScript Libraries: Use JavaScript libraries like Lazysizes or lozad.js for more advanced features or broader browser compatibility.
- Viewport Detection: These methods detect when an image is about to enter the visible area and then load it.
Lazy loading reduces the initial load time by only loading images as they become visible. This makes your website feel more responsive. It also saves bandwidth, which is a significant benefit for mobile users. Are you ready to implement this?
Tools and Resources for Image Optimization
Several tools and resources are available to help you optimize images effectively. These tools can automate many optimization tasks and help you get the best results. What tools do you need?
- Image Editing Software: Adobe Photoshop, GIMP, and Affinity Photo have features for resizing, compressing, and formatting images.
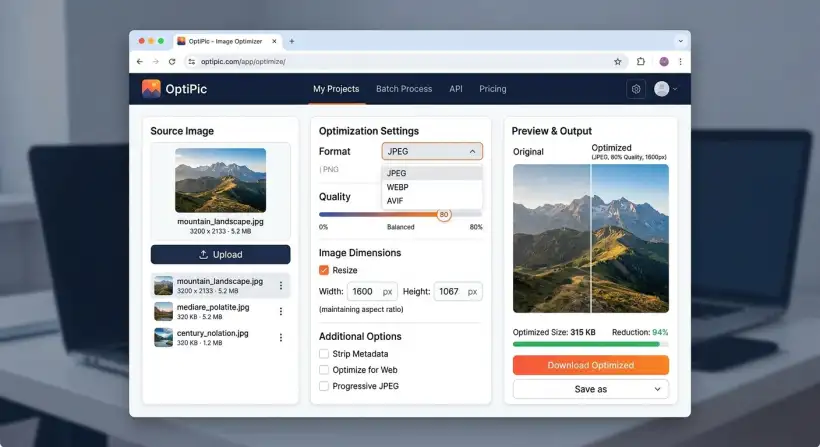
- Online Image Optimizers: Websites like TinyPNG, ImageOptim, and Optimizilla offer simple interfaces for compressing images.
- WordPress Plugins: Plugins like Smush, EWWW Image Optimizer, and ShortPixel can automate image optimization if you use WordPress.
- WebP Conversion Tools: Use tools like Squoosh by Google or online converters to create WebP images.
Using the right tools can streamline your image optimization workflow. It helps you get optimal results with little effort. You have many options.
What this means for you
Optimizing images for faster website speed is essential for website owners, bloggers, and marketers. The benefits extend beyond faster loading times. So, what does it mean for you?
You can do the following by optimizing your images:
- Enhance User Experience: Faster loading times lead to happier visitors. This increases engagement and lowers bounce rates.
- Improve SEO: Faster websites rank higher in search results. This increases organic traffic.
- Boost Conversions: Improved website performance can lead to more conversions and sales.
- Save Bandwidth and Costs: Optimized images use less bandwidth. This may reduce hosting costs.
The time and effort spent on image optimization will pay off. You will see an enhanced user experience, better search engine rankings, and increased conversions. You can also apply these techniques to other SEO aspects. Would you like to know more?
Risks, trade-offs, and blind spots
Be aware of potential risks, trade-offs, and blind spots while image optimization offers many benefits. What should you look out for?
- Quality Degradation: Aggressive compression can cause a loss of image quality. It's crucial to balance file size and image quality.
- Time Investment: Optimizing images can take time, especially with many images. Automate the process to help.
- Compatibility Issues: Older browsers may not support modern image formats like WebP. Provide fallback options.
- Incorrect Implementation: Improperly implemented responsive images or lazy loading can hurt performance. Test thoroughly.
Consider these factors and test your optimizations. This ensures they provide the desired benefits without unexpected issues. Do you have a contingency plan?
Main points
Image optimization is vital for website performance and SEO. You can improve your website's loading speed and user experience by implementing the techniques and strategies discussed. What should you do next?
- Choose the Right Format: Use WebP for optimal compression and quality. If not, use JPEG for photos and PNG for graphics.
- Compress Your Images: Use lossy compression for photos and lossless compression for graphics.
- Resize Images Appropriately: Ensure images fit their display areas and consider retina displays.
- Use Responsive Images: Implement responsive images to adapt to different devices and screen sizes.
- Implement Lazy Loading: Load images only when needed to improve initial load times.
- Use Optimization Tools: Use tools like Adobe Photoshop, TinyPNG, and WordPress plugins.
- Test Your Optimizations: Regularly test your website's loading speed and image quality to ensure everything works as intended.
- Monitor Performance: Use tools like Google PageSpeed Insights to track improvements and identify areas for more optimization.
Start optimizing your images today and see the difference in your website's performance and user engagement! Do you want more tips? You may also consider exploring strategies for sustainable marketing, or even staying current with new marketing trends.